As I start to learn new skills for my new position, one of the things that was suggested to me was to look into nested virtualization. In my ignorance, I didn’t know what was meant by nested virtualization, but it turns out that the term refers to running a hypervisor on top of another hypervisor. A fairly normal use case is when someone runs VMWare Workstation on a MacOS laptop with a Windows VM, and then, within the Windows VM, runs something further virtualized like a Linux appliance (Say, EVE-NG).
As I mentioned in an earlier post, I’m trying to learn a lot of Linux for my new job, and so this was a chance to combine a lot of similar tasks. Since I still have the Ubuntu Desktop VM, I downloaded KVM (a Linux-based hypervisor, similar to VMWare), installed the package on Ubuntu, and then used KVM to allocate resources for a CentOS VM that would run on the Ubuntu box, running as a VM on my Windows desktop.
I used this article for the most part to help with the exact syntax of the KVM commands, but overall I would say the process wasn’t bad at all. Explained in further detail below:
Step 1: Download KVM.
On Ubuntu, you use the apt-get package install utility to grab qemu-kvm, and it grabs all the dependencies automatically. If not, the article above has the exact packages required.
I don’t have a screenshot for this part, but this would be the string to download and install KVM:
sudo apt-get install qemu-kvm
Step 2: Add user to KVM groups for permissions
I haven’t run into permissions issues yet, but it was suggested to ensure there wouldn’t be any permissions issues by adding the user to the libvirt group, which is created when KVM is installed.

Step 3: Check System for KVM Compatibility
This may seem counter-intuitive, but KVM must be installed before you can check system compatibility.

If the above output is observed, KVM is working correctly. If there are errors, refer to the article I linked above.
Step 4: Connect to the KVM application:
Now, KVM should be running. Connect to it like this:

Step 5: Create a VM
At this point there are multiple options for creating a VM, just like VMWare. In my case I opted to mount a folder with ISO images on my Windows computer to my Ubuntu VM, which is the KVM host.

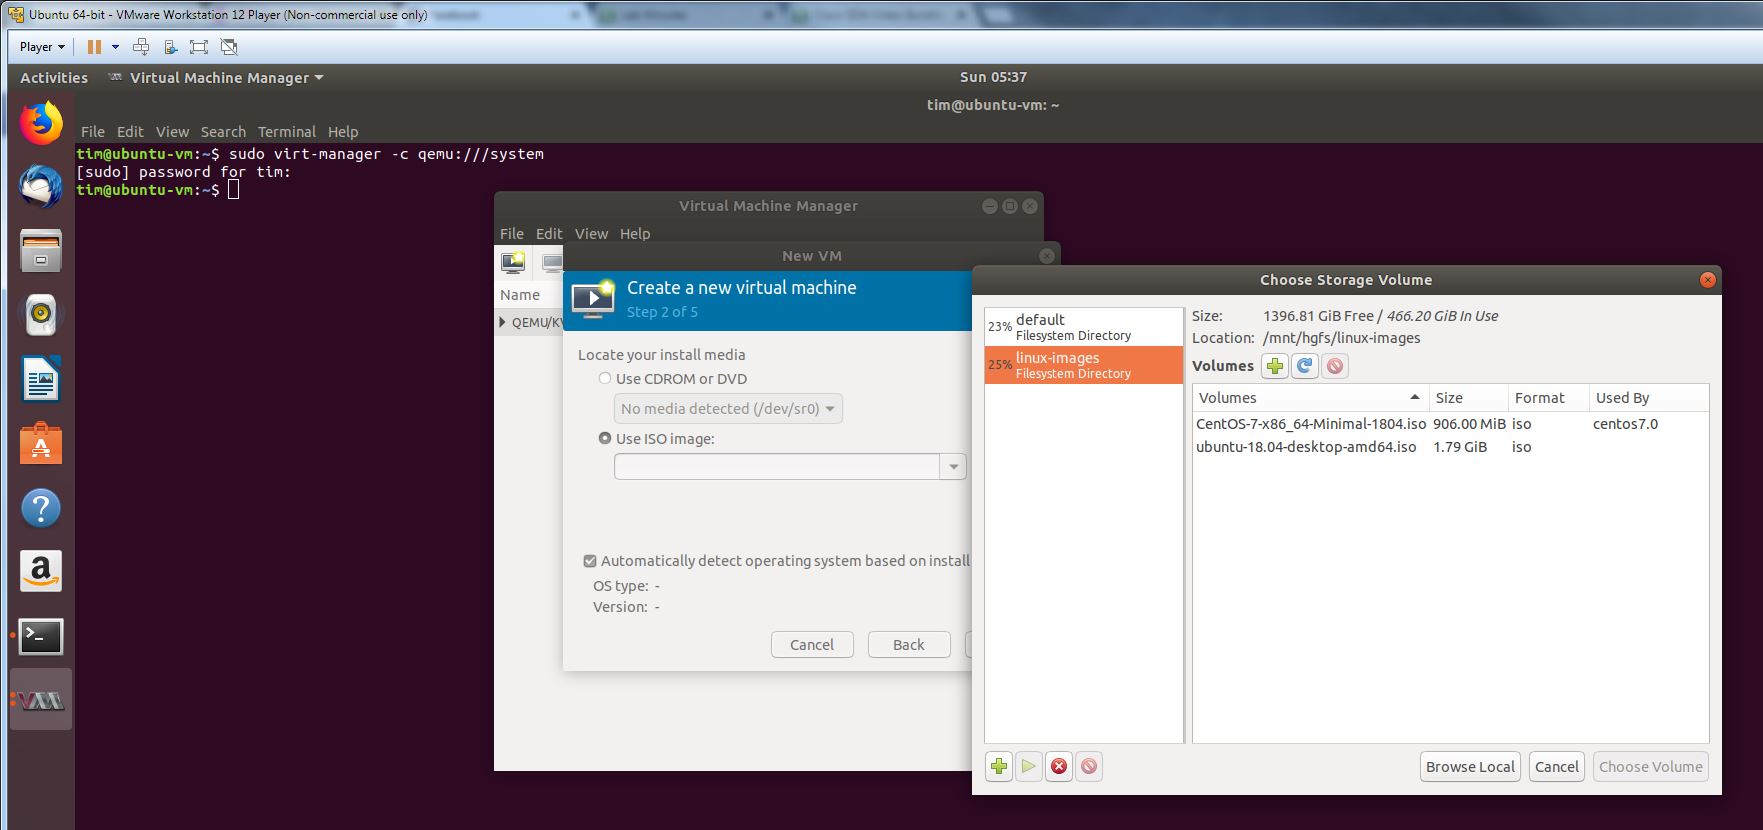
After that, I created a new VM and chose to target an ISO file with CentOS.

Choose Use ISO Image, and Browse. Under the Storage Volume menu, choose Browse Local and navigate to the mounted file share directory containing the ISO you want to use.

Decide what resources to allocate to the new VM. Be aware that the resources available depend on the resources allocated to your KVM host, NOT on the physical hardware. Refer to the system requirements of the OS or virtual appliance you intend to install.


At this point you’re basically done. The network adapter choices will depend on your KVM host. For this, I used NAT.
And here is the finished product:

I plan to play with this more and see if I can access the CentOS host directly from my windows box, but I need to look into options on the best way to do that.


